The EveryZ installation is very simple. By downloading a bash script and your running, or parameterized assistant, the Zabbix frontend changes and new features are added.
Categoria: Documentation
-
ZabGeo – Creating a token in the MapBox
How to create your token for mapbox API
Access a URL http://www.mapbox.com
Create your account by clicking “Sign”.
After creating your account, on the main MapBox page, click “Account.” After click “API access token” and then “Create a new token”;Provide an identification name for your token, for example: mytokenzabgeo and then click “Generate.” Okay, your key has been created. Copy the token and configure EveryZ.
Configuring the Token in EveryZ
Now go to EveryZ, in Zabbix Extras menu. Click Customizations and Paste the generated Token, in the Token field.
Note: Start Plan allows 50,000 views / month free of charge (50,000 map views / month for public and free sites, mobile apps);
In the MapBox, you can access statistics to view token views. To see how statistics click Stats on the MapBox menu.
[Starbox]
-
ZabGeo – POI’s icons
ZabGeo standard icon
The default icon is ZabGeo Ze (mascot of Zabbix-Extras), this will be displayed when the op selected as <Manual>the default icon and has not been changed in customization.</Manual>
This image is included in the images of Zabbix during the installation process of the EveryZ, and will be identified as zbxe_default_icon.To change the default icon, create a new icon in Zabbix, this icon should have the format 32 x 32 pixels, you can use images in a range of 64 x 64 pixels, but appears as 32px.
Creating icons in Zabbix
Administration/General menu, select Pictures. With the type icon, click on the button “Create icon”. On the next screen enter the name of the icon, for example: ‘ pin-linux ‘, and then click Add.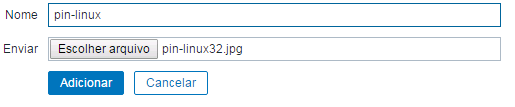
Now in Extras/EveryZ/Customizations standard POI item in select the icon that was created.

Creating mapping icons in Zabbix
The ZagGeo allows them to be used standardized icon for host, by configuring host inventory field “type”, associated with the mapping of icons.
For example, to configure icons where the hosts are associated with the Operating System, in “type” enter the operating system (Linux, Windows, etc), then create a mapping images, where the inventory field must be “type” and the expression must be the same as the text that was filled in the inventory of the Host, then select the image for the icon.
Tip: the icons in Zabbix should have the format of 32 x 32 pixels, you can use images in a range of 64 x 64 pixels, but appears as 32px.
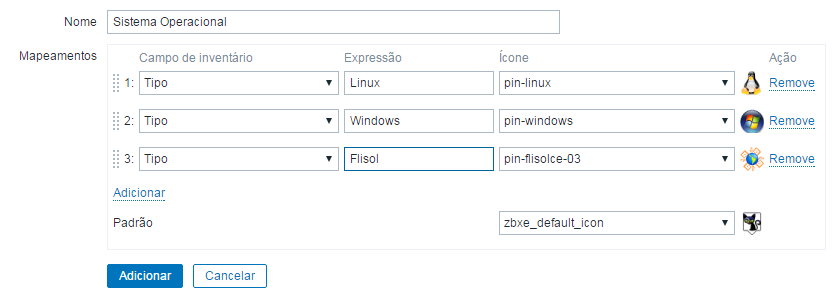
Administration/General menu, select icon Mapping. Enter the name of the mapping, notify the registered in the type field of the Expression host and add the desired icons for their respective types. Don’t forget to select the default icon, to be used in cases where there are informed a host type.
After include the images and create the mapping, return to the geolocation Module and select your mapping in “Automatic Mapping icons” and the result will be as shown below.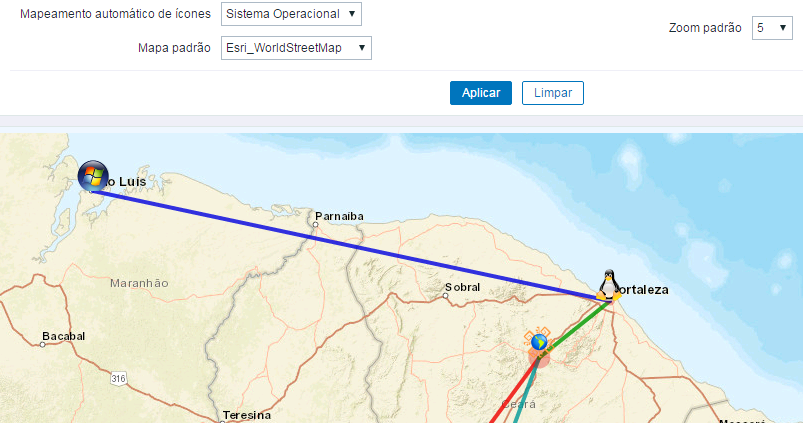
[starbox]
-
Customizable logo
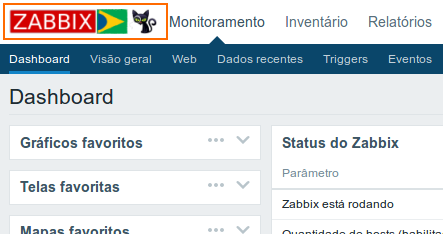
One of the older patches that we created was allowing select dynamically the logo of Zabbix in the upper left corner of the screen.
With him it was possible to place your company logo easily. This patch has expanded and now allow the customization of the site’s logo and the logo on the login screen. In addition it is possible to adjust the size of the logo of the site to suit any logos that are shorter.
The images to be used as logo must have size compatible with the available space:
- Site logo
In order to avoid distortions in the aesthetic website, this picture should have your fixed height (25 pixels) and size compatible with the configured screen customizations (by default is 120 pixels). The default image is a composite of Zabbix logo and the flag of Brazil (country from the creator of the patch).
- Login logo
This image must have 120×25 pixels.
[starbox]
-
Global Search
Located in the upper right corner of the Zabbix Global Search is a very useful feature that allows we will study in almost all Zabbix database to locate hosts, templates and their groups. With your right buttons with links to the official repository of templates (share.zabbix.com) and help (www.zabbix.com/documentation).
As the EveryZ adds content in the menus of Zabbix, we made modifications in the Global Search that your size is dynamic, getting bigger when it receives focus.
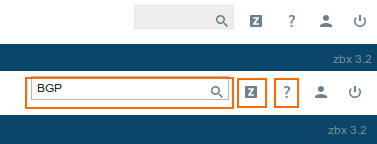
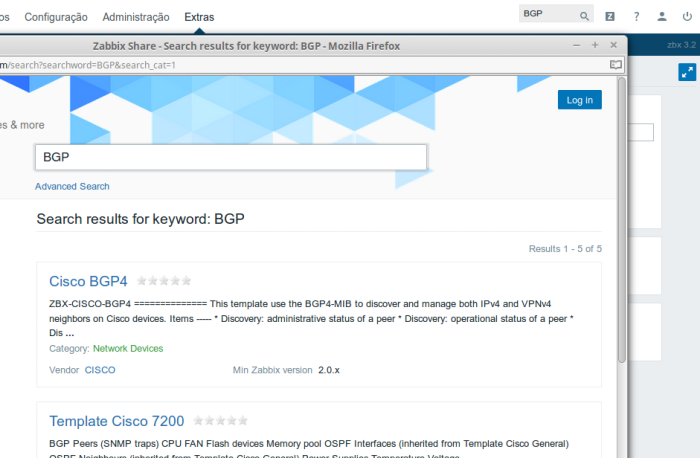
The functionality of the buttons Share and Help were lightly modified to enable the respective websites are open already in search mode, searching for the term you entered in the Global Search. The following image illustrates the use of the Share button to search for templates store BGP.
The following image demonstrates the use of the help button to search for term Item in the official documentation of Zabbix.

-
Dashboard
Soon after the installation of EveryZ what one notices more easily in Zabbix modification is the addition of a menu and change the logo located in the upper left corner of the site. When you click on the option EveryZ inside menu Extras you are forwarded to the EveryZ dashboard that gives access to the modules. (mais…)
-
ZabGeo – Geolocation Module
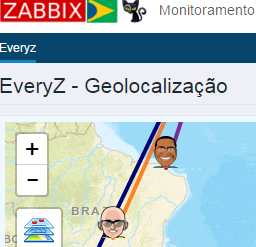 Zabbix has maps feature, but it works so static. The geolocation module implements the use of dynamic maps, with zoom feature, navigation, map style, creating connections between host, creating circles to definition of area around a host.
How to access the geolocation module?
Click in the menu Extras/EveryZ/geo-location, select the host group, the standard map and the default zoom level, enter the latitude and longitude of the center point you want, and then click Apply.How do I use ZabGeo?
Before you begin using the geolocation feature is necessary to make the settings that are described below:Configuring hosts
 Visit the host configuration, which appears in ZabGeo, host Inventory tab, change to “Manual” and enter the latitude and longitude data in the corresponding fields and click “Update”. Repeat this step for the other hosts that will be displayed on a map.
How to obtain the longitude and latitude data?
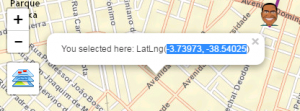 Select the desired point on the map and click with the right mouse button. The popup with the data will be displayed, copy the data to the host.
In this example:
Latitude:-3.73973 and Longitude:-38.54025)Hint: the same feature can be used to set the center point of the map and fill in the data of the search filter.
Creating connection between hosts
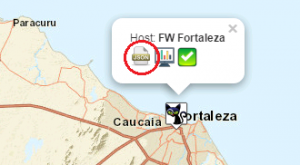 Now we have all hosts with latitude and longitude data set. So we can make the connections between the host. Click on a host, in the popup select the icon JSON. A settings screen, it have two tabs:
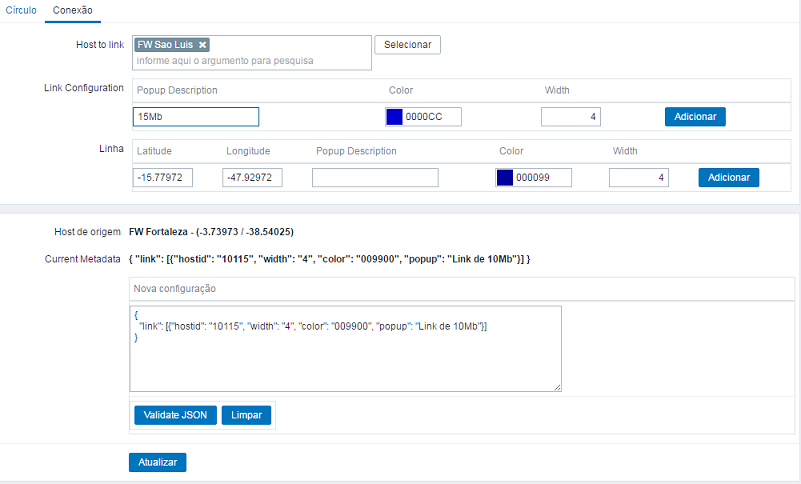
Circle and connection.Click connection to set up the link with the target host. Then click “Select” and choose the target host, then enter the data for the description, color, and width of the connection to be created. Now click the “add” button to generate the JSON code, which will be presented in the metadata. To validate the metadata, click on the button “Validate JSON”.
Then click “Update” to record the metadata in the configuration of the host and close the window.
To create new links to other hosts repeat the walkthrough above.
Creating a circle around the host
To create a circle, which can be used for example to demarcate the area of coverage of a Wifi antenna, click the host and select the icon JSON. On the settings screen, on the circle, enter the color information and radius of the circle, in meters.
Click “Add” and then JSON validation. Then click Update to save the data on the host.
Zoom feature
Use the mouse scroll to adjust the zoom level, click and drag the map to navigate or use the-/+ keys (less/more) to adjust the zoom and the directional keys on the numeric keypad to navigate.Standard map
To change a different style of map select a choice of styles available. It is possible to magnify the styles by creating an account at MapBox service and configuration of token in the Everyz customization. To learn how to create an account on MapBox click here.[starbox]
-
EveryZ Documentation
Every is a hack created to increase the native functionalities of Zabbix frontend. One of main changes is add in Zabbix web interface the possibility of dynamic menu Items and a framework to help you to create new modules.
We have a group on telegram to support issues, join-us: https://t.me/everyz
[extra_taxonomies][starbox]